

Create a multimedia course
Course information
- Course title : Set a title for the course. Make sure it defines exactly the subject of the course while being concise and catchy. Try to include keywords to improve its visibility on SERPs.
- Course description : In this field, you can describe what this course will involve, discuss its lessons and quizzes and give a general idea of what students will learn from this course. You can also give a brief overview of the program and discuss the learning objectives of the course in this section. Using the toolbar at the top of this text box, you can format the text, add links and also insert media.
- Extract Use the Extract field to add a shorter description of the course.
- Author : Edit the instructor in this drop-down list. By default, the selected author is the creator of the original course.

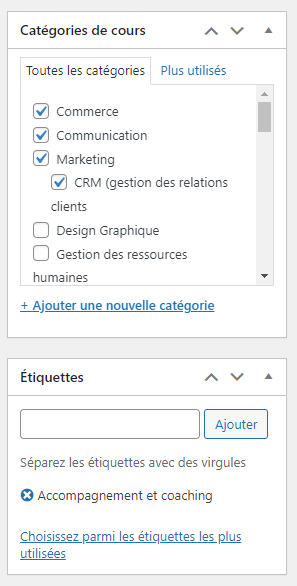
Category of course
Option « Choose a class category » allows you to classify your online course into specific subjects or fields of study. This makes it possible to organize and group similar courses, allowing students to search for and find courses that meet their needs more easily. Labels are essentially keywords linked to a course. These will help potential students find the courses they need through search engine results. You can add, display, change labels.
Course parameters
Under Course parameters, you will find General tabs. Below is an explanation of what the options in these tabs can do.
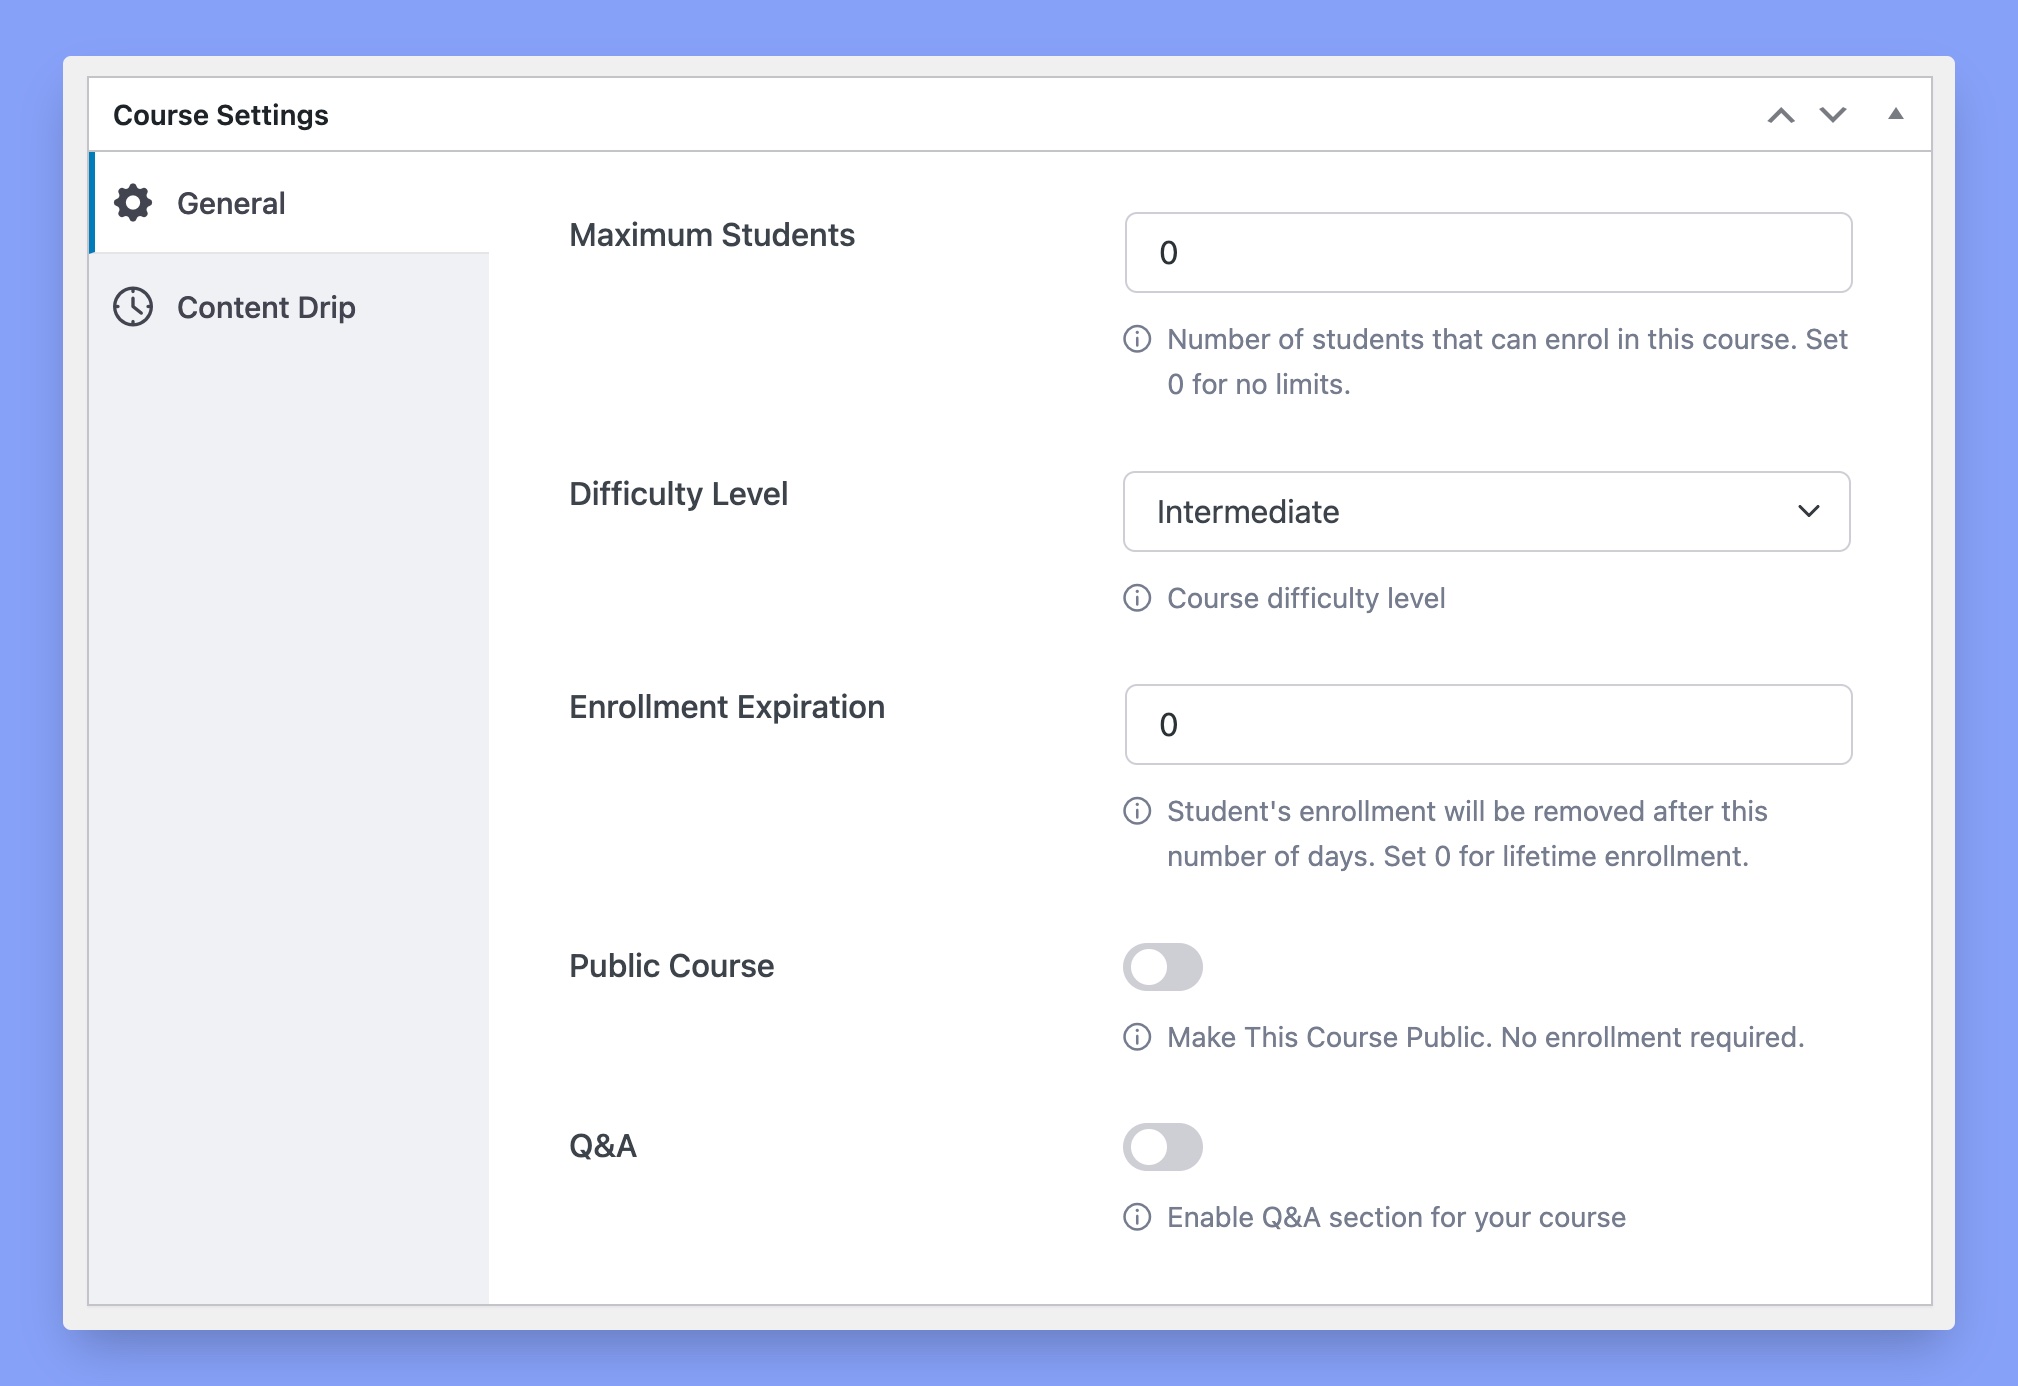
- Maximum number of students : set the maximum number of students who can register at the same time. This is useful if you run a university institute.
- Level of difficulty : limit the level of difficulty so that students have an idea of the level of progress of the course before purchasing it.
- Expiration of registration Set the number of days a student will be enrolled in a course. If you set this parameter to 0, it means that students are enrolled for life. You must enable this option in the course settings. To find out how to activate, please refer to the course settings documentation.
- Public courses : enable this option to make a course public. Public courses do not require registration.
- Q&A : enable the Q&A section for this course. This feature is a great way for students to get in touch with the instructor.
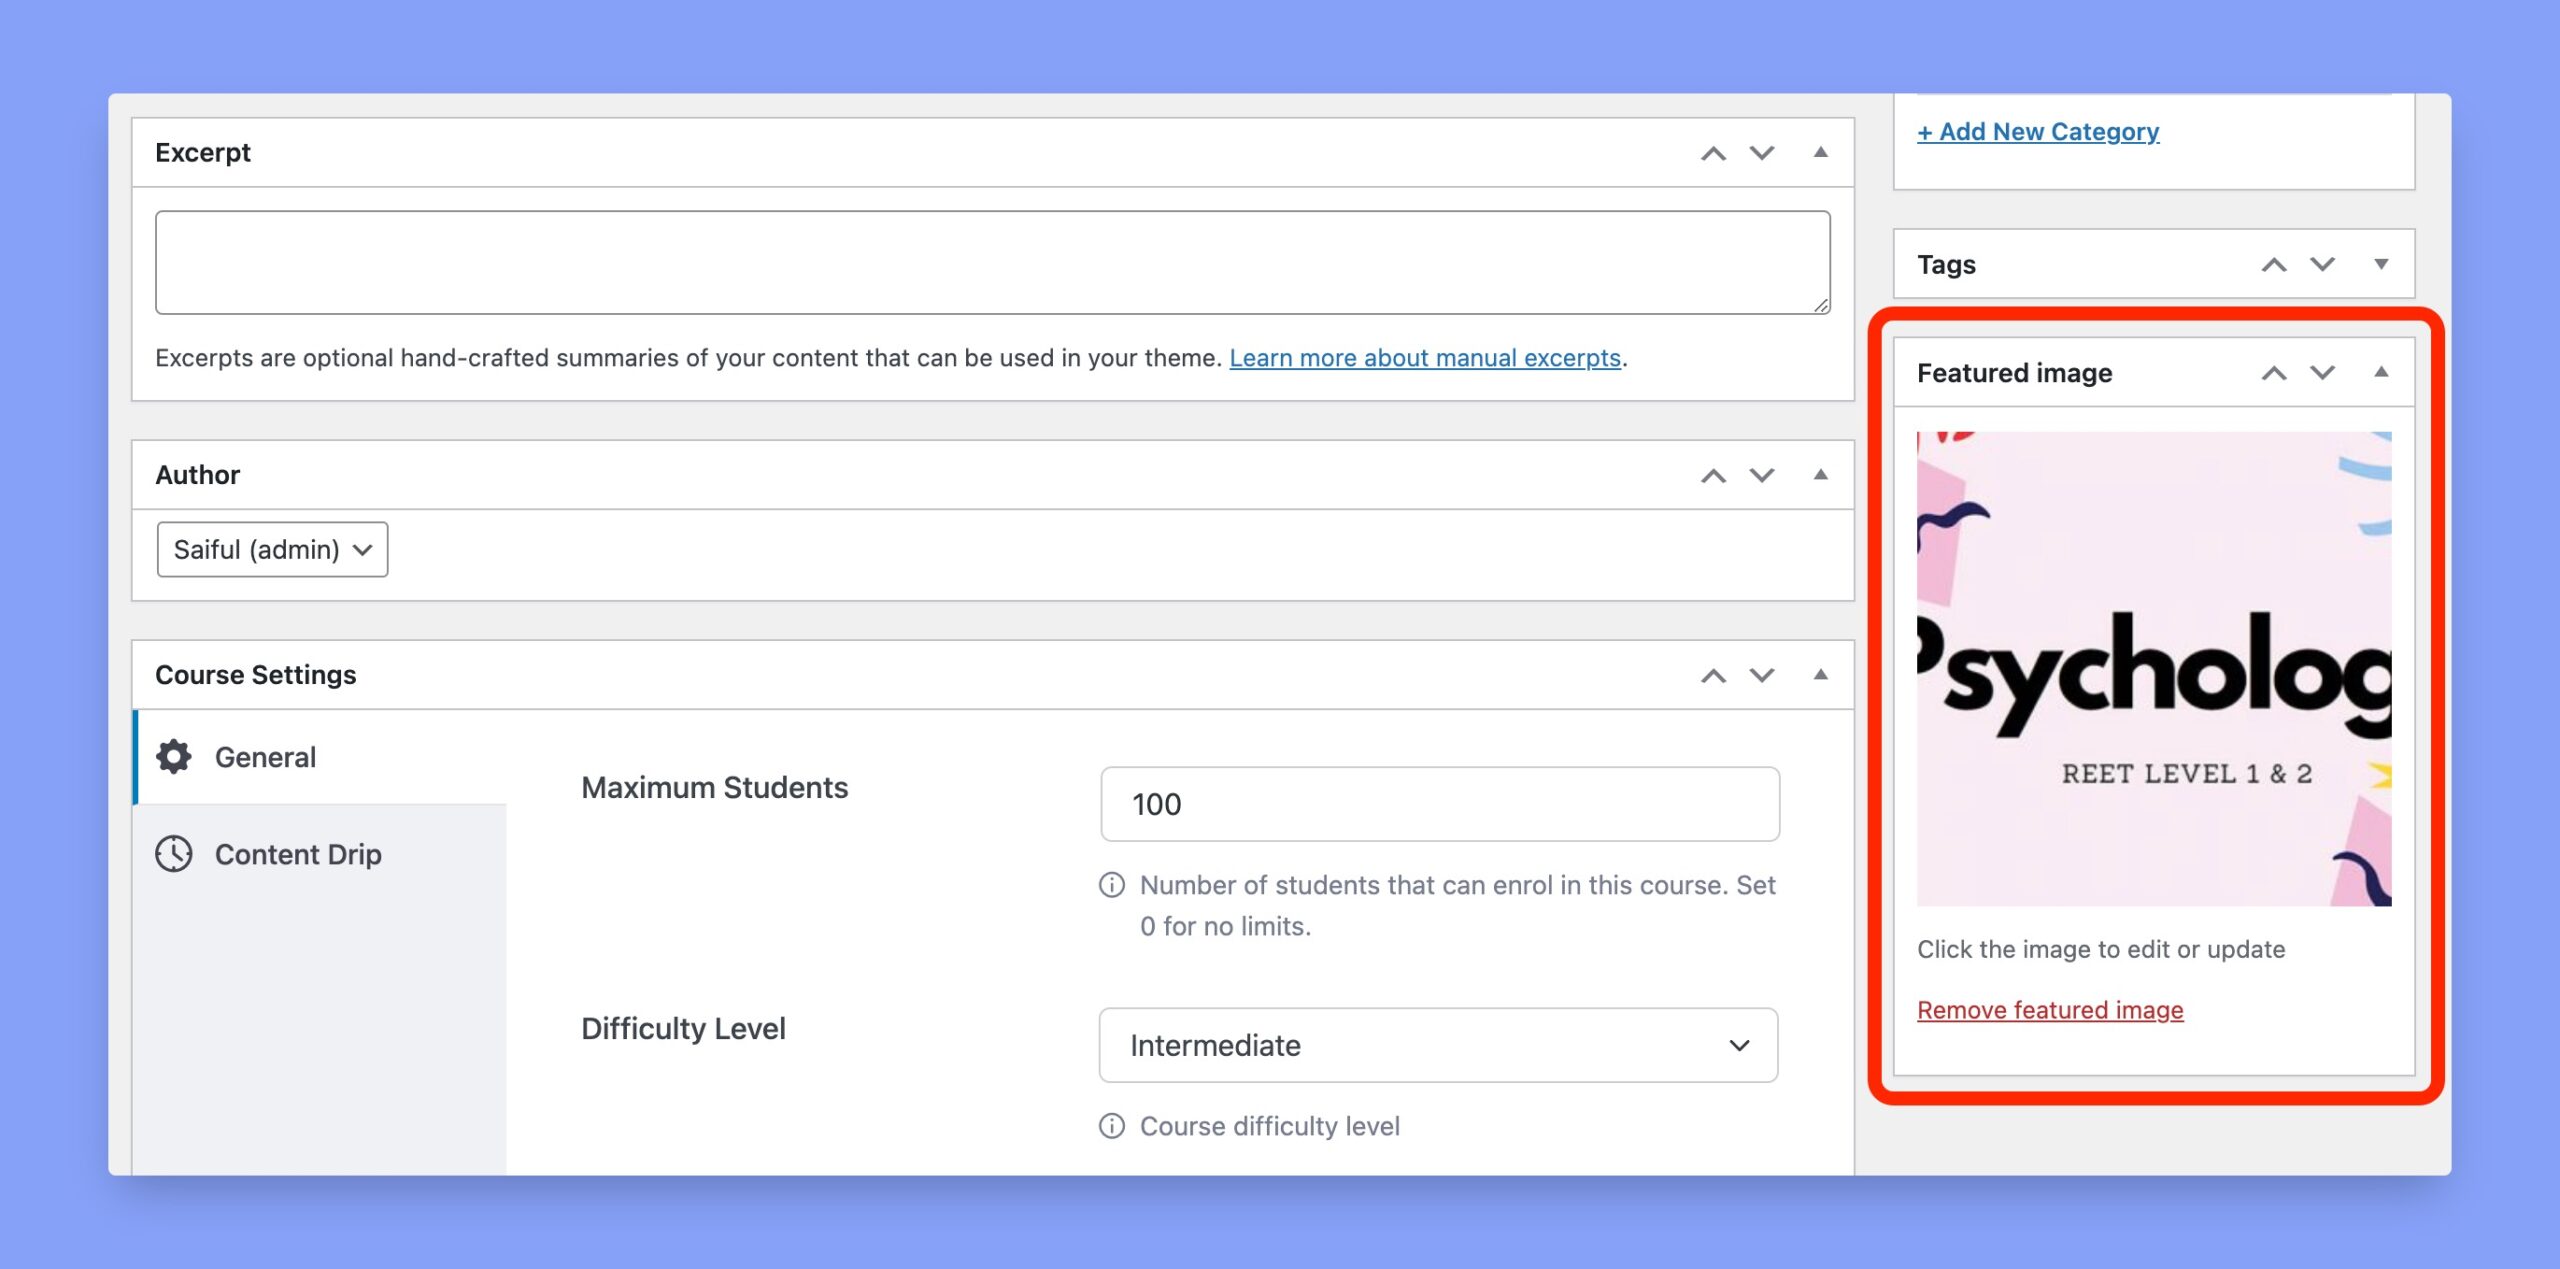
Course coverage image
On the right side panel, you will see a section called Image Focus on which you can click to download a cover image of your course. By clicking on it, you will open the Media Manager from which you can either select an image in your media library or download a new one.
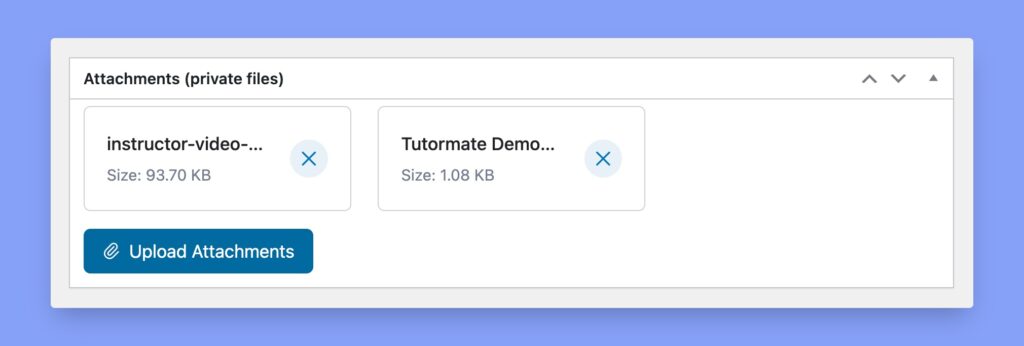
Attachments to the course
The attachments in the course are resources such as practice files, sample files and other necessary files that you could use in the course content. You can reach them by downloading them here and they will appear under the Resources tab of the Course Details page so that students can download them.
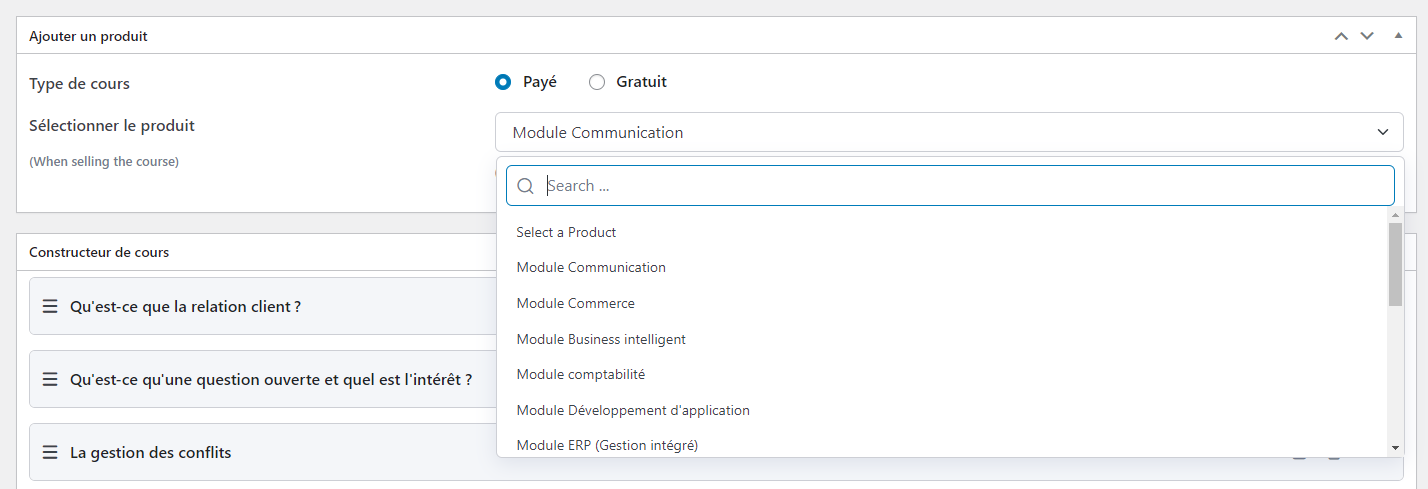
Addition of rate (if the course is paid)
You can set the price of the course from this section. By default, all courses will be free. To set the price of the course, select the Pay radio button and select the module for your course from the drop-down list.
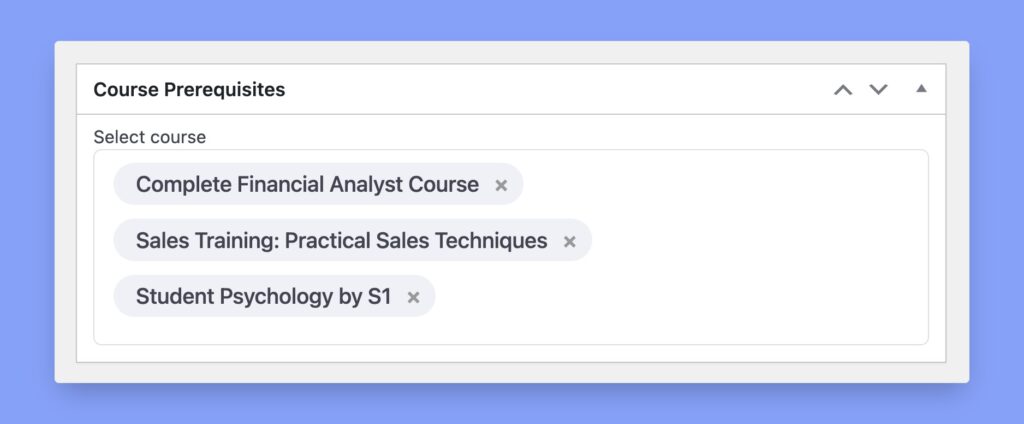
Prerequisites
Prerequisites are courses that you must complete to access this course. For example, if you have 2 courses named Advanced Programming Language Bases and Programming Language Bases, set the basic course as a prerequisite for the advanced course. This will ensure that students complete the basic course before accessing the advanced course.
This will allow you to create a real structured learning path for students, with different courses addressed to different levels of students.
Additional parameters
The following data serve as informational data for potential students while also serving as marketing support for your course.
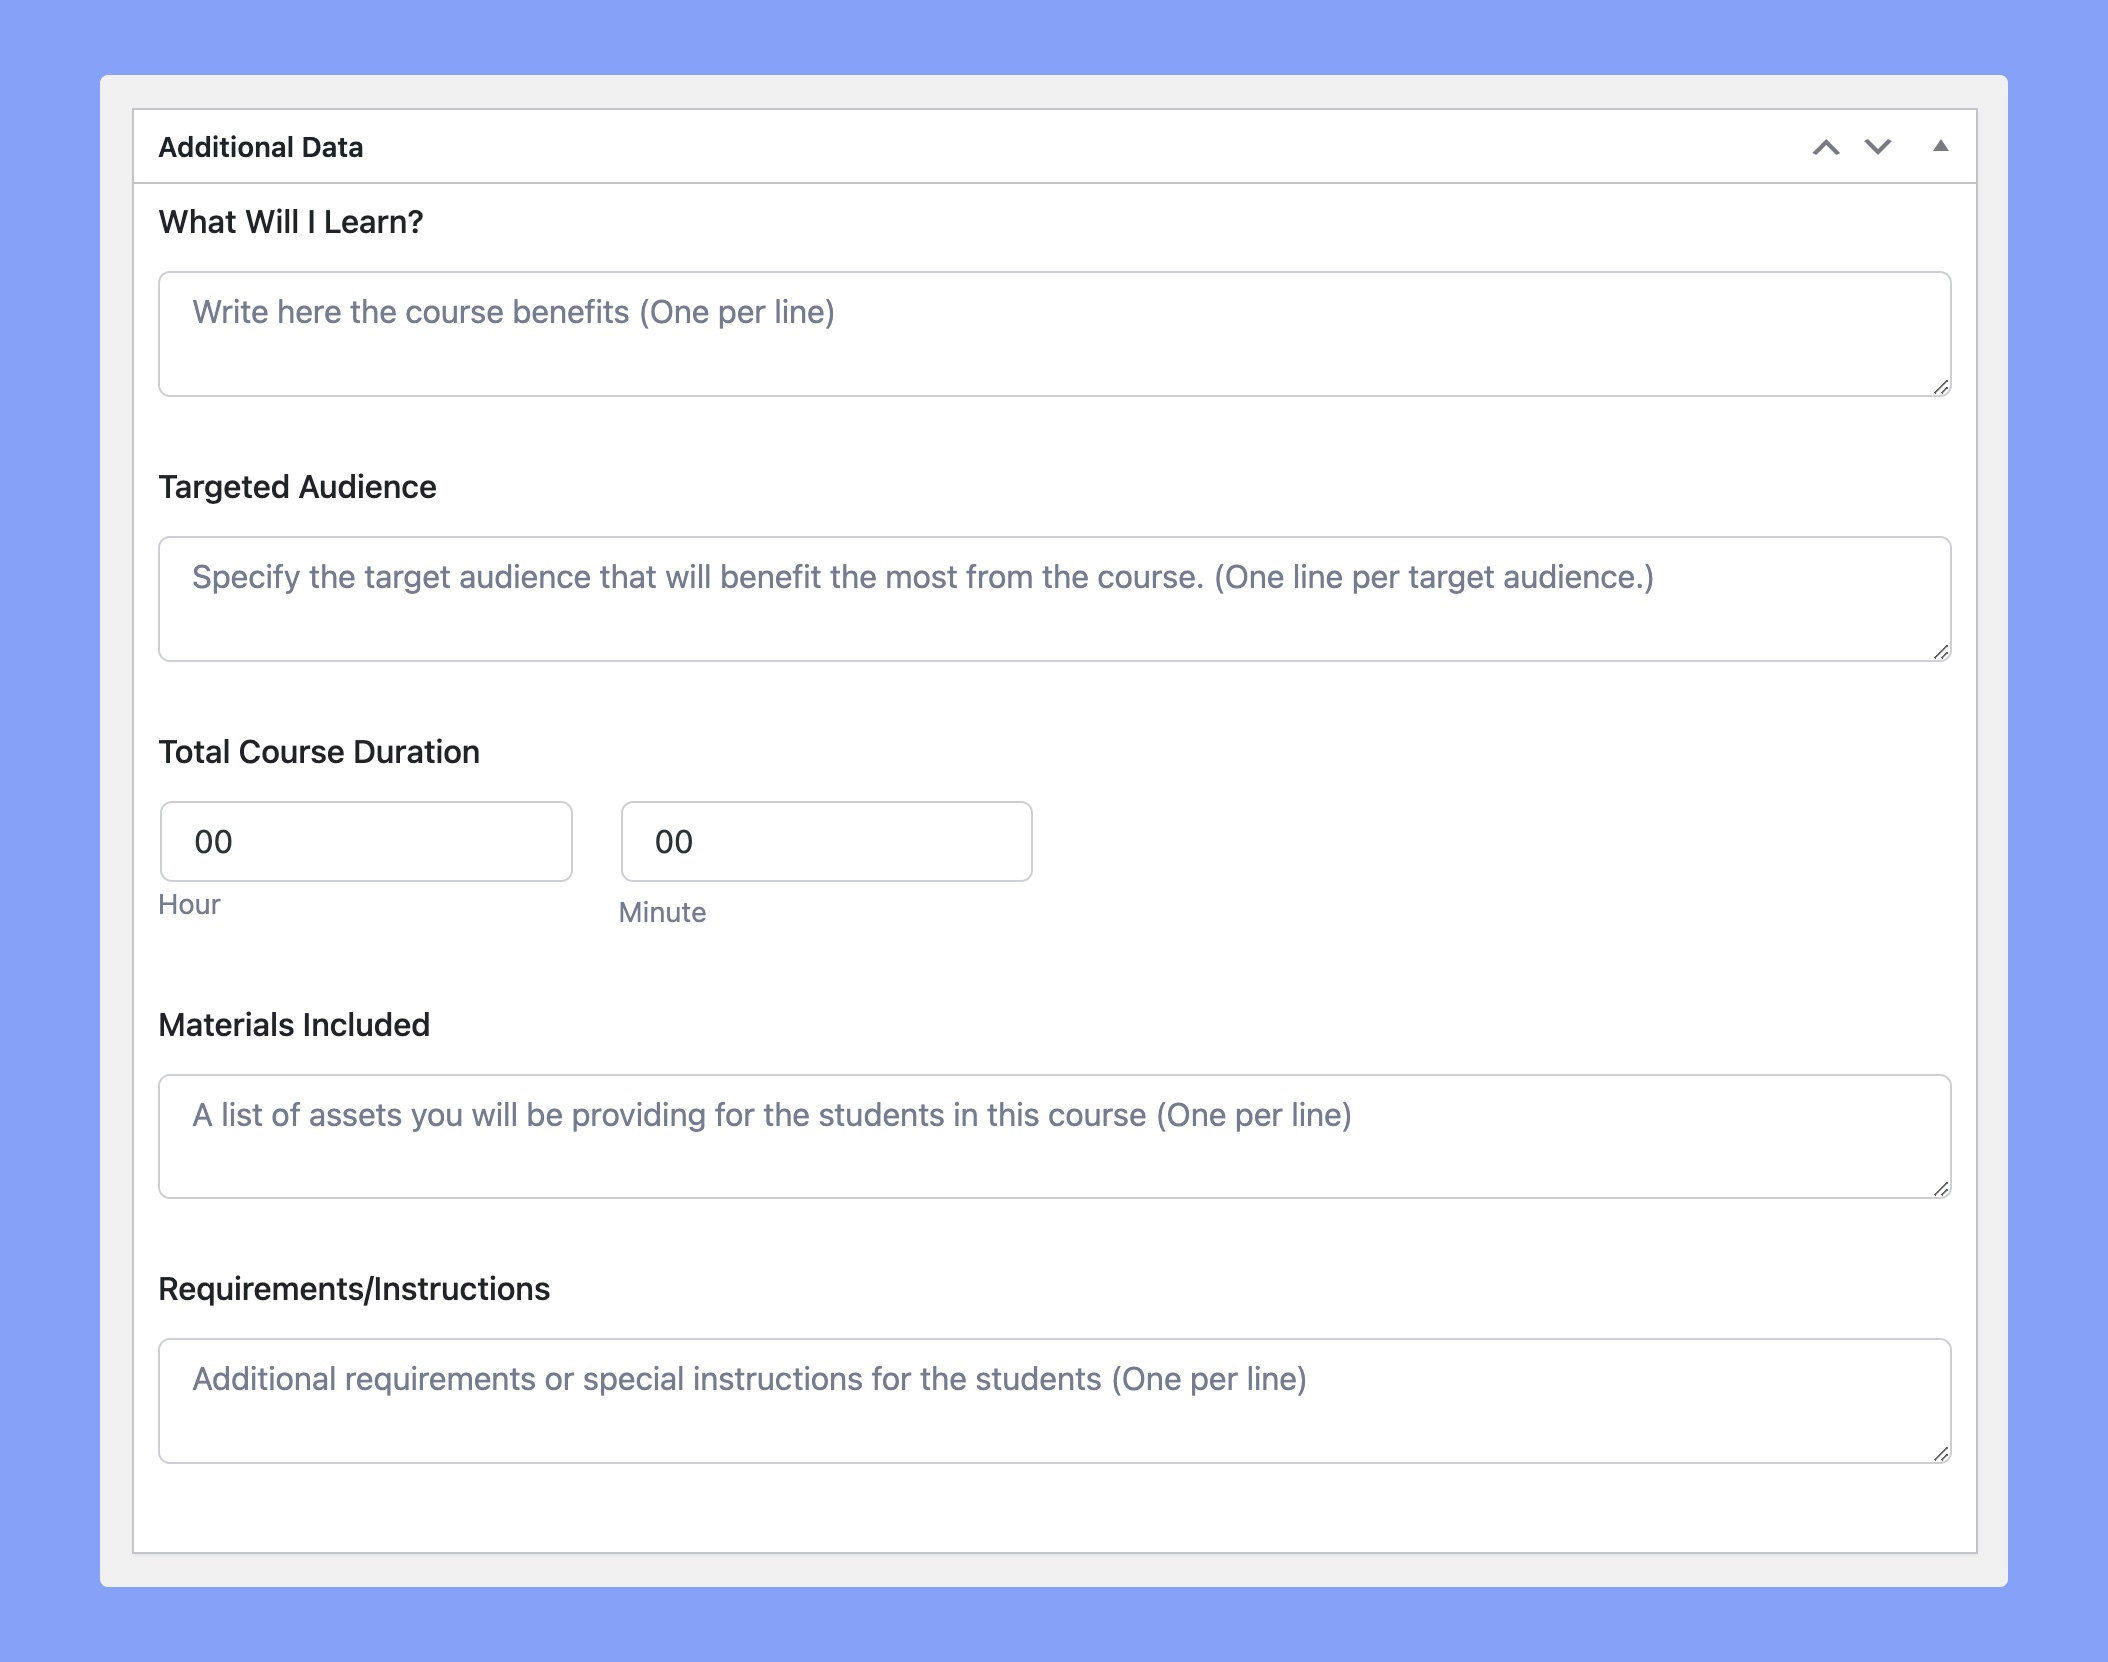
- What will I learn? : List the knowledge and skills students will learn after completing this course. Write one skill per line.
- Target audience : Specify the target audience who will benefit most from the course. Write one line per target audience.
- Total duration of course : Specify the total duration of the course, i.e. how long it will take a student to complete this course.
- Equipment included : List the learning materials students will receive by completing the course.
- Requirements/instructions Add additional requirements or special instructions for students. Write one requirement per line.
This will allow you to create a real structured learning path for students, with different courses addressed to different levels of students.
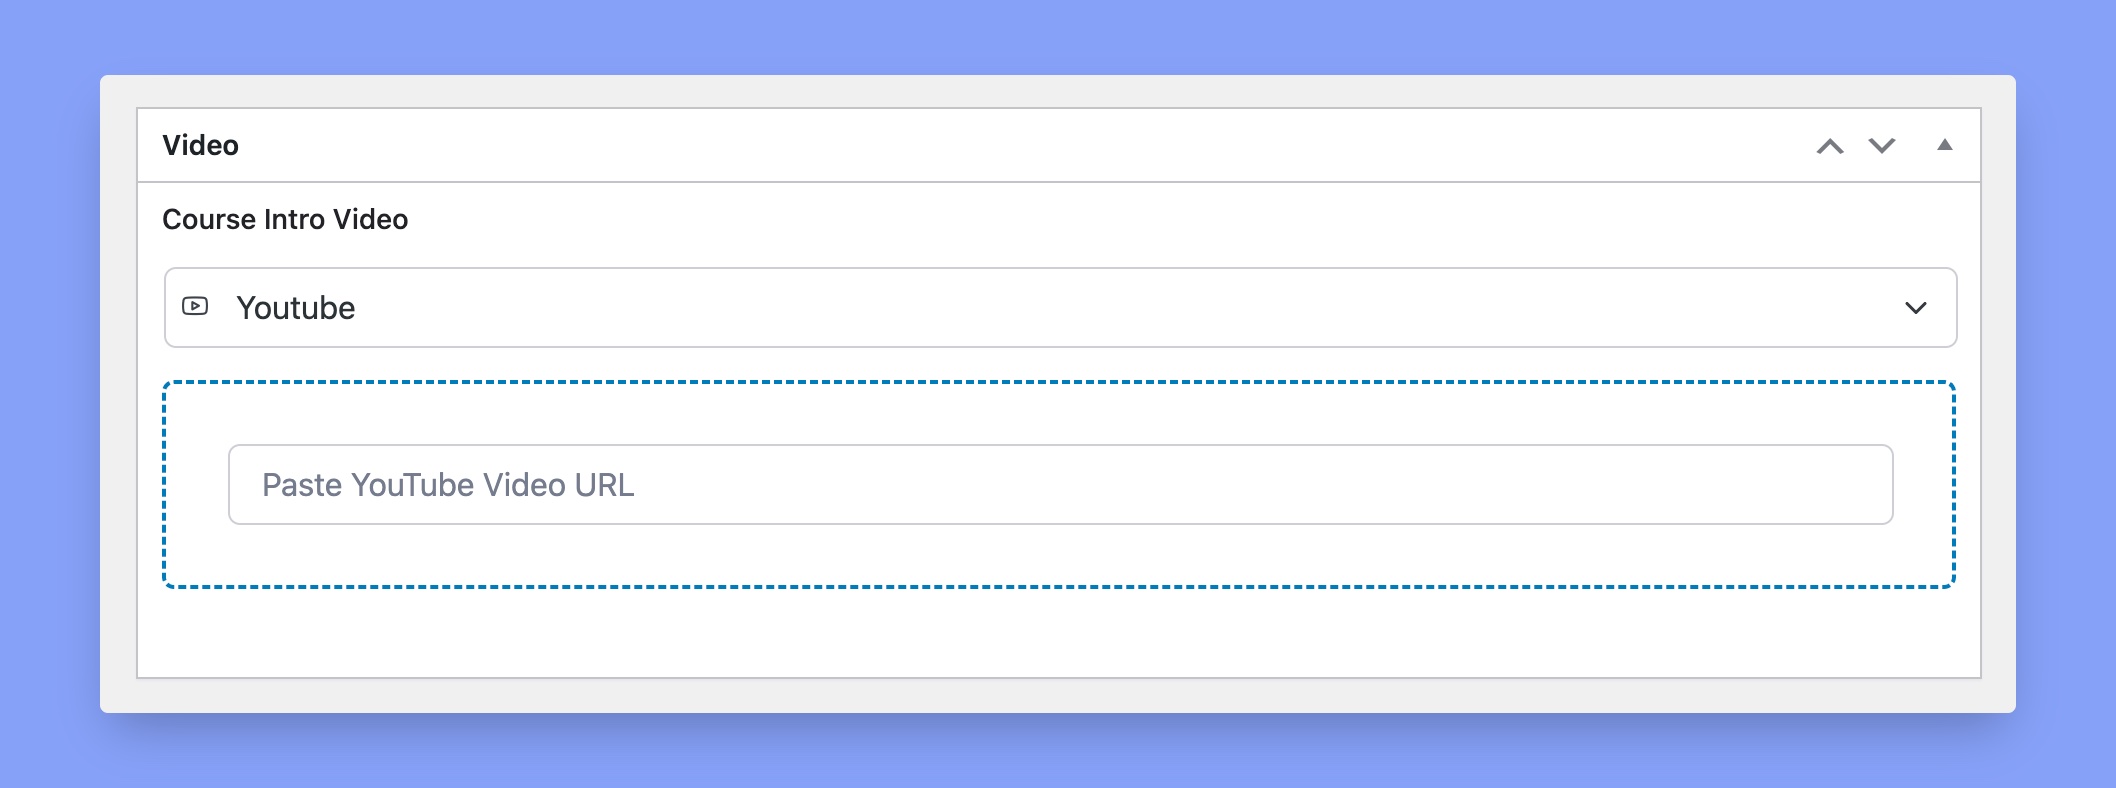
Video introduction to the course
Here you can add an introductory video to the course that will appear on the course details page. To do this, select a video source, then enter the file, URL or code. If the drop-down list of video sources does not list any options, this means that you have not yet activated any video sources for your LMS site. Supported video formats: HTML5 (MP4) – External URL – Youtube – Viméo – Integrated Small code
Finally, click Create to save your course.
